My Corcoran jumpers fully Antiqued and ready to wear
A solid pair of well broken-in boots are a thing of beauty. Having discovered a great looking a pair of circa WWII Corcoran jump boots a couple of years ago while cruising Pinterest, led me to a chap's blog post where he was kind enough to detail the process of antiquing a new pair of Corcorans with full photos from start to finish. In April of 2016, I bought a new pair of brown Corcoran Jump boots and decided to give it a go and I've been extremely happy with the results. Unfortunately, this chap's blog either no longer exists or I am too dense to find it again. So, having been asked several times how I accomplish this result, I've decided to detail the process here. Sadly when I Antiqued my boots, I hadn't thought at the time to document the process in photographs, so this blog post will be largely descriptive.
A Brief history of the US Army Jump boot:
Originally these boots were made for US Army WWII service members as paratrooper boots initially in brown and the uniform was later switched to black. As a personal note, my father was a paratrooper early in his army career (late 1950's and early 1960's with the 82nd Airborne) and I'm sure all the boots I ever saw around the house were black, although by the time I have any memories (the early 1970's), he was no longer a jumper, having wisely switched to being a chopper pilot and I'm sure his at that time would have been the lug-soled combat style boots. Paratrooper jump boots were designed by Lieutenant Colonel Yarborough who also designed the actual Parachutists Jump Wings, the M-1942 Uniform (WWII Paratrooper uniform) and also various other parachute delivery equipment. You can read more about the jump boots here and here.
The man behind the boots: Lieutenant Colonel Yarborough
Here looking the total badass in Vietnam:
These boots were only worn by Paratrooper who had earned their 'jumper' wings and were considered a right of passage among the troops at that time. Made by Corcoran Boot Company under contract to the US Army, they were (and still are) made from very thick and strong leather uppers which were Goodyear welted to a man-made rubber sole. Interesting, these particular boots are differentiated from standard combat boot by their Ankle reinforcement and lack of a lug sole, which were considered to be a possible hazard to get caught up in the harness and para-cord of the parachute canopy during a jump and so the jump boot version forgoes the lugs (I'm not sure if this story is heretical, but that's what I've read).
When new, this is what they look like - they have a nasty brown painted on finish, but we can soon correct this:
These fine boots have a long and storied history since World War II and have been made by the Corcoran boot Company to the same design and quality, to my knowledge during all those intervening years. There are a couple of sources for this boots including eBay in both the US and in eBay Germany as well as several reputable Military type stores, which you can easily locate with an on line search. It's important for our purposes that you DO NOT buy a cheaper substitute, as many of these off branded boots are made from extremely inferior leathers and may not withstand the antiquing process that is described below!!
A Word About Sizing:
These boots fit large and are also wide (mine are 'EE'). The size I bought is US10 and fit very well. I usually wear a size US 11, so I recommend sizing down by one whole size.
The detailed instructions:
Things that you will need to achieve this look:
1/2 liter of denatured alcohol.
Several rags or a roll of paper towels.
Rubber gloves
Thick paper or plastic to protect your working surface
Neatsfoot oil.
leather Antiquing gel (Briar brown, Dark Brown or Mahogany).
Dark brown and Mahogany leather dye from Feibing's,
Kiwi Shoe polish in Brown, Cordovan, Tan and Neutral (Neutral Parade gloss works great).
Also very important: heavy duty rubber gloves!!
Step 1. Breaking in your boots - this is critical for both the look and ultimately the wearability. of your boots: 1. After you've made sure the boots fit OK (they're going to be stiff as hell and torture to wear laces all the way up, but don't panic, they'll be broken in by the end) it's time to soak them in a tub of cold water overnight. The next day drain them and let them begin the dry out.
2. When about half dry put them on and wear them around for a day or two in order to break them in and get them to shape to your feet and calves and to achieve those great creases around the ankles. I recommend also while wearing them to do plenty of deep lunges, which with really get those creases around the ankles going. The boots will be quite stiff to start so don't plan on being able to lace them to the top right away and wearing thick socks will help prevent too much discomfort. Then as they start to soften up, lace them up a bit more until you can wear them with not too much discomfort laced to the top and just walk around for a few hours per day.
3. Finally take them off and let them dry completely (away from heat sources). This might take a couple of days.
Step 2. Now it's time to strip off that horrible painted on brown finish. For this you will need plenty of rags or a roll of heavy duty paper towels and the denatured alcohol. Wet a wad of paper towels or a rag and get to rubbing. Don't worry about getting every bit of the original finish out of every crease and crevice as this will add to the character of the final boots but do try to get the vast majority off. Then Allow the boots to dry for a couple of hours.
Step 3. When the boots have been stripped and have dried, treat with the neatsfoot oil. This will recondition and soften the leather and replace any of the oils that were lost through the wetting and molding and stripping process. A couple of applications are probably a good idea. Allow the neatsfoot oil to soak in and dry out for a few hours.
Step 4. It's time to being the staining process. This is a mess so don't forget the rubber gloves. Apply a light layer of the Antiquing gel(Briar brown, Dark Brown or Mahogany) - go easy here and be prepared to wipe off right away - the exposed leather tends to soak this in at a surprising rate and you don't want your boots to get too dark. Your boots should start to look pretty cool at this point. ideally the creases and crevices will keep a bit more of the antiquing. Also, if you'll be using new leather laces like I am, you can run them through a paper towel with the Antiquing gel to give these a vintage look as well.
Step 5. It's time to add a bit of the leather dye. Again wearing Rubber Gloves. But before you do, dilute the leather bye by mixing it 1 part Mahogany, 1 part Dark brown and 3 parts denatured alcohol. You won't need much of this - all mixed up probably less than 5 oz total will be more than enough. This will dilute the dye so that the boot will not get too dark. Apply one quick, light coat to the boots with a wadded up rag or paper towels. The color will go on dark but lighten up substantially as the alcohol dries from the leather. One quick application of the leather dye should be enough. Allow to dry for a 1 or 2 hours. if after that you want them a bit darker, apply a second coat and allow to dry.
Step 6. Once the leather dye has completely dried. It is now time to begin using the colored shoe polish to achieve your final color. Just use several coats of wax alternating as desired between Kiwi Shoe polish in Brown, Cordovan and Tan, buffing off in between coats of different color until you achieve your desired final color. lastly several coats of the neutral parade Gloss shoe polish as a top coat and to give your a nice gloss. Remember, these are military boots so there is no such thing as too much shine. Enjoy your newly vintage jump boots!
To inspire you, here are some photos of my boots as a motivation. To do this, you don't need to be a great leather worker or have any experience, just carefully follow the directions in order and have patience with each step and your jump boot project can turn out great as well!!
BTW: these are the only boots/shoe that I own in which I don't use shoe trees because I really want that old school hard worn-in look:
Here is the great creasing at the ankles that I love on these boots:
You can see that even after two year of occasional us, these rubber soles show almost no wear:
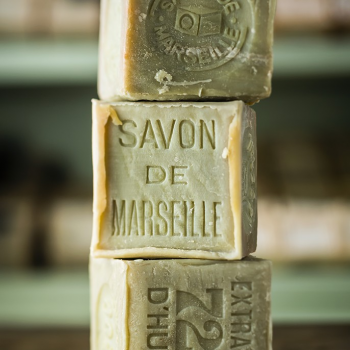
Bathing is one of man's great pleasures. The soap a man uses should not detract from but enhance this sensual experience. I've used many a bar of soap in my day and not a few liquid soaps as well. One of my favorites over the years has been the natural Olive Oil soaps manufactured in the Marseilles region of France where they have been famous for making great soap for more than a thousand years. In 1688 it became law that only soaps made according to strict, ancient methods could bear the famous mark “Savon de Marseille.” These are the original, authentic, hand-crafted artisanal products made in the city of Marseille and trusted for generations for pure, gentle care. The company that manufactures the soap I've been using is Savonnerie du Midi. Here is a brief history from their website:
'The Savonnerie du Midi is one of the last remaining soap factories in Marseille that still uses the traditional expertise of a Maître Savonnier – a Master Soap Maker. The Savonnerie has been perpetuating time-honored methods for 120 years and continues to make traditional Marseille soaps, boiled in a cauldron, with a passion.'
There are a number of things I love about using this genuine ancient crafted soap:
I've loved firstly the smell. It's a fresh earthy smell that reminds me of dried herbs and olive oil - it's hard to describe, but it smells ancient (in a fresh sort of way) and with not a bit of perfume (unlike too many soaps I've used over the years). The second thing I love about these soaps is the size of the bar - it's huge! The 600g bars that I use are ridiculously large compared to average store-bought soap - about 4 times as large as a typical bath bar and they are square. At nearly 3.5 inches (or 9cm) square, they are more than a hand full and seem to last forever. In reality a bar will typically last me nearly 4 months - more on that below. Of course, if one is small of hand, soaps in a smaller 300g block or 200g with standard bar soap shapes are available as well. Thirdly, I can use these soaps for my face, my body, washing my hair, shaving (I have always wet shaved with soap and Savon de Marseille is my favorite). Hell, I can even brush my teeth with it if I like. Which I have done - the taste is not too bad (if a bit salty); it's supposed to be great for your teeth by the way (read more about tooth care with Savon de Marseille in this link). Apparently, it is also manufactured in flake form to be used as a laundry soap (which as yet, I've not tried).
Here are two short videos at one of the few factories still in operation:
The Savon de Marseille that I like can be a bit expensive and hard to find. I do know of a couple of stores here in Munich that stocks it, but it's a hassle to go into town and I often forget to buy soap when I'm there, so I last year I decided to take matters into hand and just ordered a package of 6 x 600g blocks on eBay. This has ensured that I've had my stock of soap that I love on hand and has made the past years bathing and shaving a true pleasure and saved me a bit of time and money as well. I'm sure all of these handfuls of soap manfacturies have slightly different recipes but would be mostly more similar than different so long as you stick with their original fragrance-free/natural color varieties.
Shaving:
For shaving the soaps lather up beautifully and leave a very slick surface on the face, which is needed for a close shave. Also, since there is no perfume and it doesn't dry my skin like many soaps do, it leaves me quite fresh-faced. Lubrication, preparation, etc. are fine. I get a beautiful, baby bottom shave each day with Savon de Marseille. And the olive oil in Savon de Marseille has an excellent cosmetic protective effect on the skin that feels soft, smooth and nice the whole day with a nice subtle odor!
(The Soap in the bowl, I've been working on for a couple of months, the packaged bar on the right will give you an idea of the size it starts at)
Long lasting:
As you can see from the above photo, the bar in the bowl has been in service for about 2 months and I would think has at least of a month or two of good service in store. This bars will last and extreme length of time if you keep them dry when not in use (a good advice for any bar soaps). I looked back at when I originally purchased my 6 pack of 600g blocks and it was a year ago yesterday. So far I've used 3.5 bars, which means these things last me nearly 4 months each! Of course, please bear in mind that my wife and daughter prefer to use other soaps for some reason, so it's only me using the soap. But I typically bath, save and wash my hair using the same block, so they do last a fair long while. One note: For washing hair is that it's a substitution for standard shampoo only; I still use hair conditioner as well.
All in all, I have enjoyed using this natural soap from Marseille for the past year and am looking forward to using it for another these blocks for several months more before I'll have to think about a re-order.
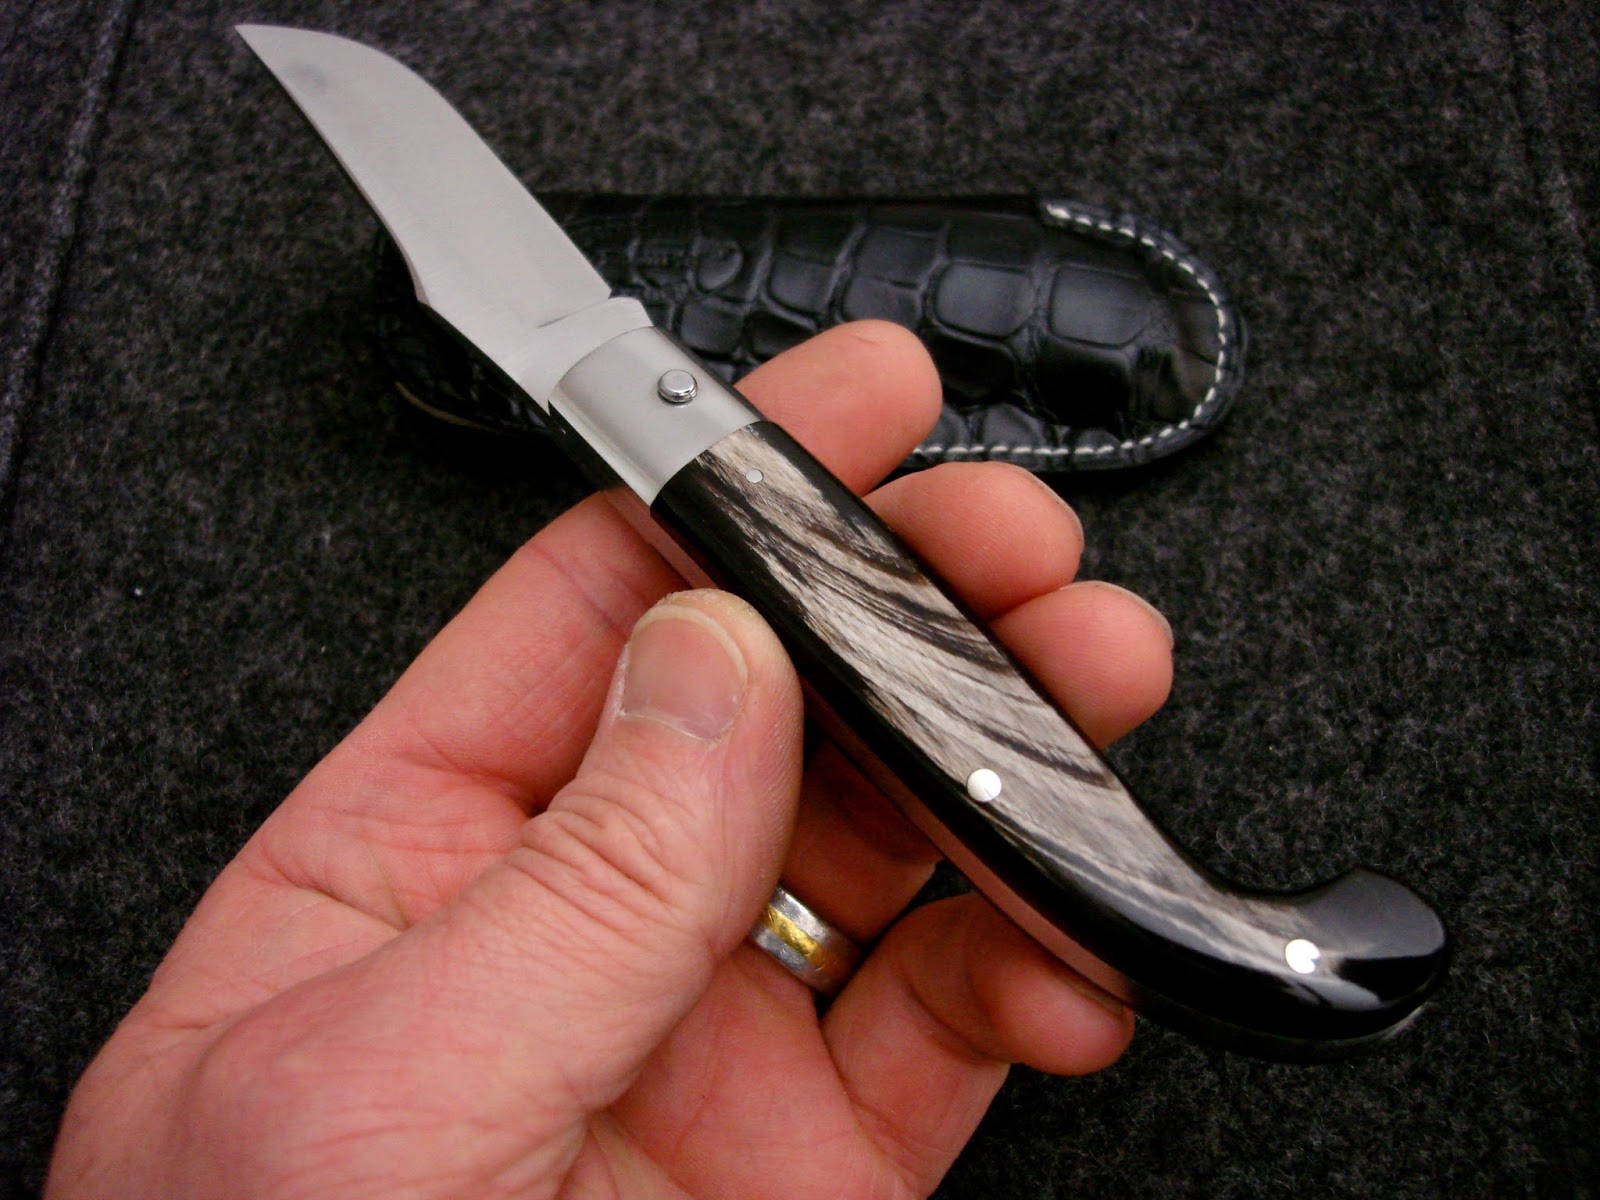
My contention is that a gentleman should always carry a pocket knife. The ways that these most ingenious of tools can be used throughout one's day are innumerable. From opening mail and packages to cutting food for lunch. I find that I'm reaching for this handy tool on a nearly daily basis and almost always regret it on the few days that I neglect to slip one into my pocket. Now some guys go for very small pen knives, but while I choose to carry pocket knives that are a bit more substantial, as a gentleman, I still insist on elegance. Nothing that looks like it should be carried by black ops commandos - no, I want my knife to be finely crafted, and from elegant materials. I prefer to carry my pocket knives in one of my custom made leather pouches that both offer better comfort in the pocket and also protect my trouser pocket from wear or damage from the knife edges. The pocket pouch you see here was made by me from Ebony Alligator with cream which stitching and is lined with ivory colored eel skin, which matches the black and white buffalo horn handle scales.
My Zuava in stainless steel with a buffalo horn handle checks all these boxes very nicely. Made by Consigli Coltellerie in Scarperia, Italy, (located just north of Florence) it's a very traditional designed spring back knife made by one of the most respected companies, from the most storied towns of Italian Knifemaking (Scarperia being famous for their cutlery since the middle ages). This picturesque Northern Italian medieval village (founded in 1306) is worthy of a visit even if you're not interested in knives. I can't believe I've not stopped on my previous visits to the area - an oversight fully I intend to remedy on my next visit Florence.
While the blade on this knife at 8.5cm is shorter than some in my collection, it is quite stout. Taken together with the handle scales being lined with stainless steel and the large stainless steel bolsters, this knife, while compact (at 19cm overall), has just the right amount of heft and a feeling of durability and quality in the hand. Small, well balanced and razor sharp, this is one of the few knives that I felt was sharpened to my satisfaction right out of the box. While Consigli doesn't have an online shop on their website, if you would like your own version, you can purchase one here.
I just love the beautifully polished black and White pattered buffalo horn handle scales!
Sharp enough to cut even the most aged prosciutto!
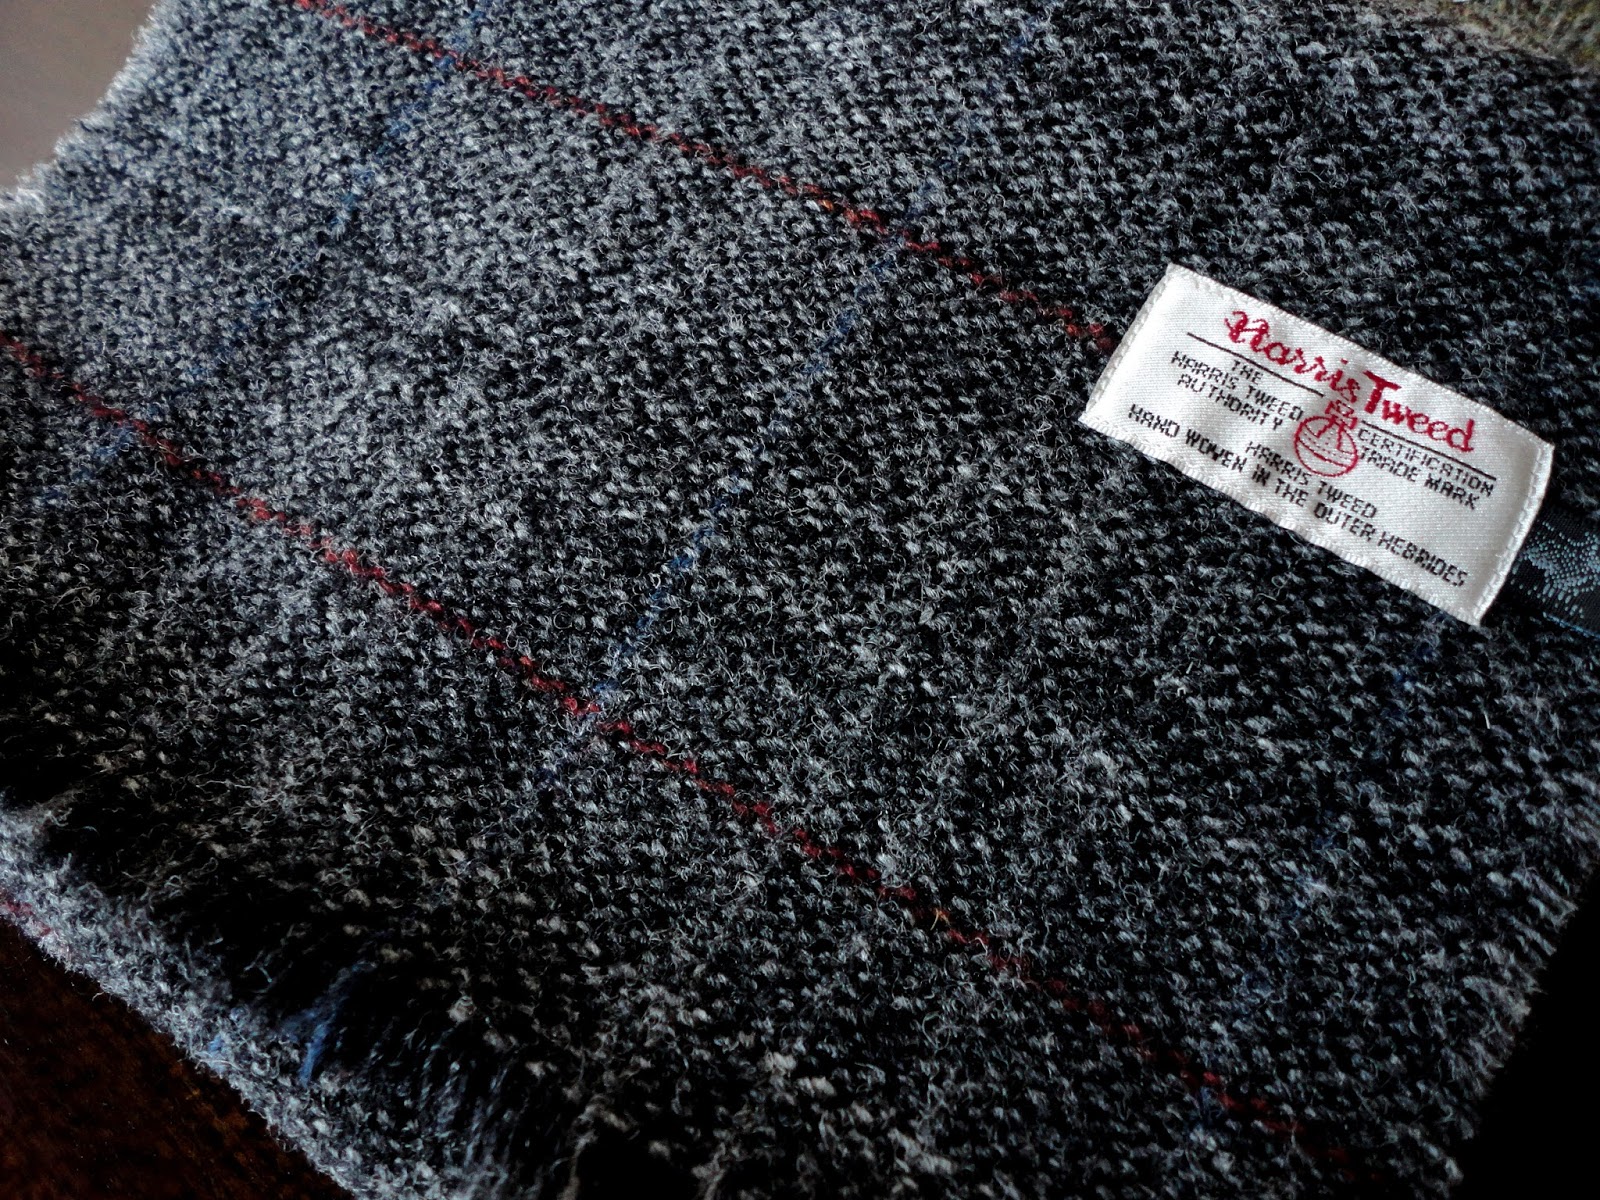
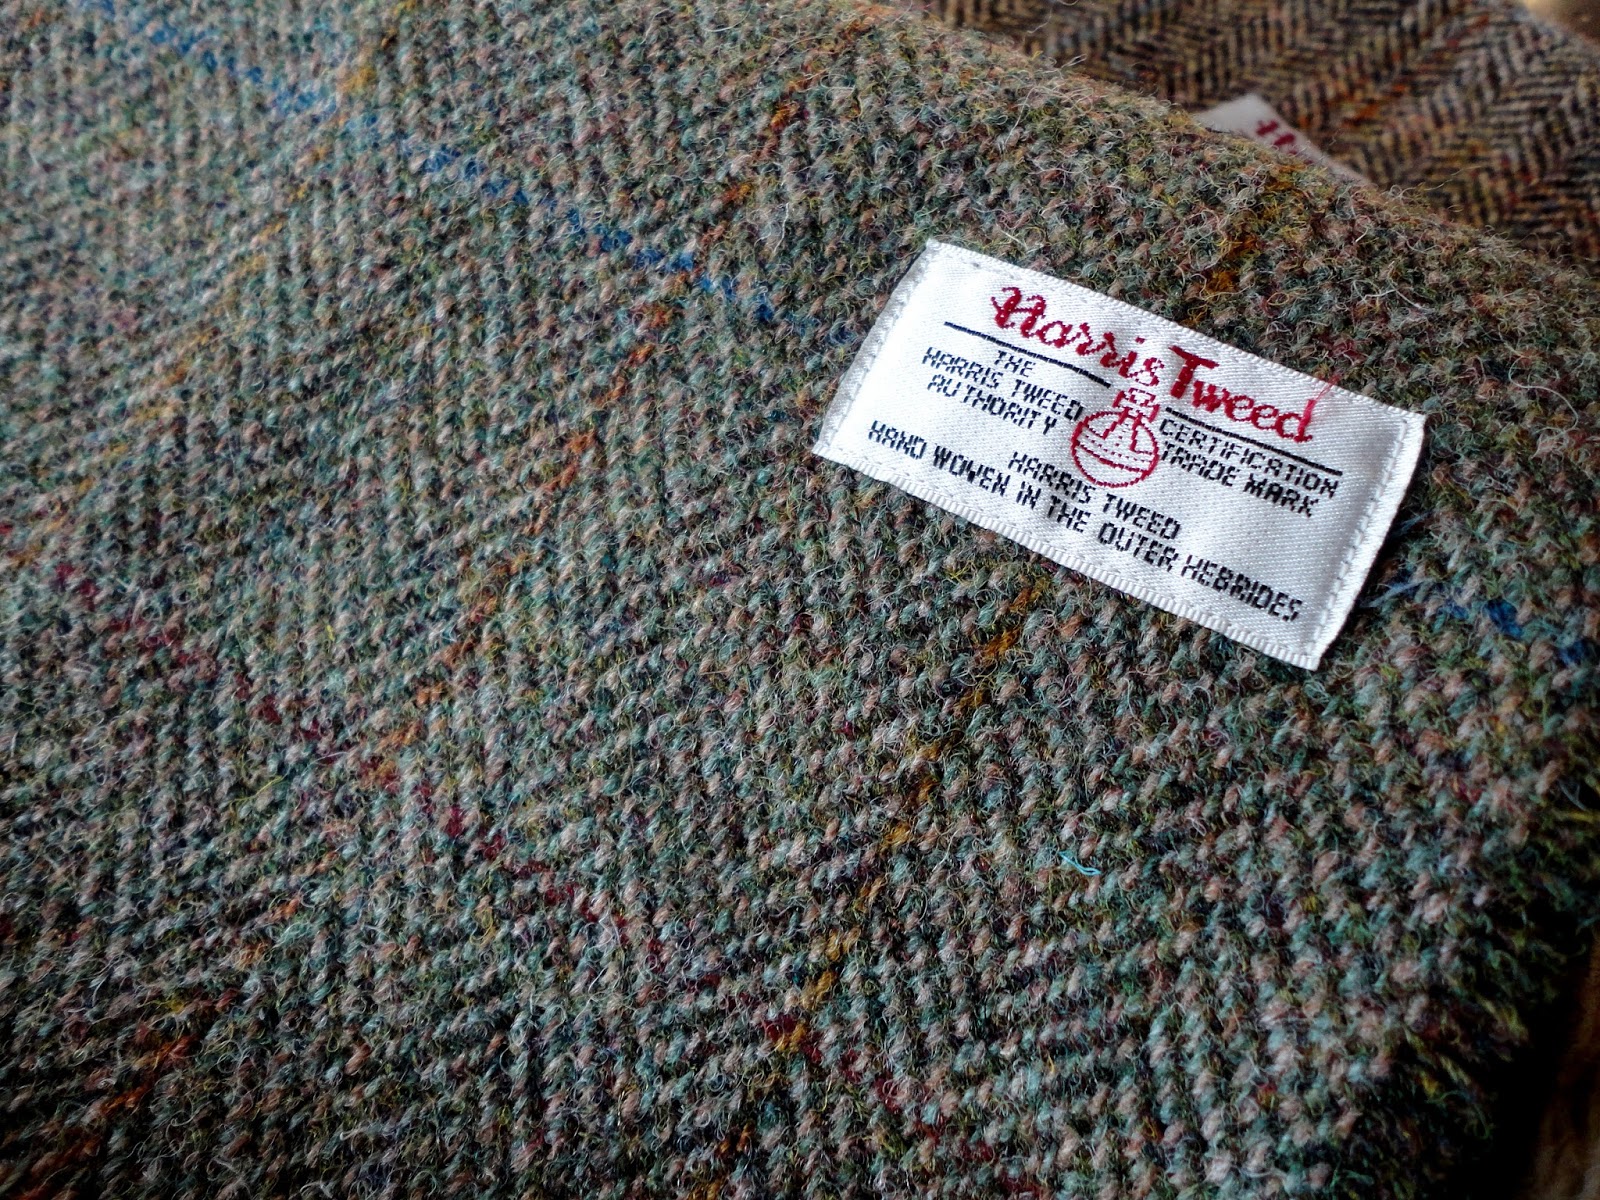
Harris Tweed has over the last decade been finding it's way into more than just sports coats and men's suits. I have noticed (and enjoyed) its being incorporated into everything from Home furnishing fabrics to tennis shoes to stuffed animals and must say that it brings a touch of class to every application I've seen. Used in combination with leather fittings, it makes a great material for wallets, shoes and travel bags ladies purses, etc. If you think you like the look of tweed, but don't necessarily want to take the plunge into sports coats or whole tweed outfits, accessories made of the Harris Tweed are a great way to incorporated the look and classiness of Harris Tweed without fear of looking like a cast member from Downton Abbey (not that that would be a bad thing - you could do a lot worse!). And if you are a dedicated tweed fanatic such as myself, it's a way to keep our favorite cloth close at hand. One company committed to the worldwide proliferation of this wondrous cloth is Ten 10 Creations. They specialize in men's pocket flasks (I can see one of these babies in my near future), messenger bags, backpacks, ladies purses, tote bags and wonderful scarfs (the later which I am featuring here). Indeed, any number of small, well priced accessories that have been ennobled by the decorative addition of my favorite Harris Tweed can be found at Ten 10 creations, finely crafted and ready to add a bit of dash to any gentleman's or lady's accoutrement. All are handmade by the good people of Ten 10 Creations, on the beautiful Isle of Skye, Scotland with the utmost attention to detail.
I must have one of these:
(Come to Papa!!)
While the light beige herringbone with orange and blue overcheck is was the first scarf I purchase from Ten 10 Creations a few years ago and is still my favorite, it's always a good idea to have variations in color to incorporate into different outfits so I've also purchased the grey check and the green herringbone. Now I will admit that these scarfs are a little scratchy when compared to some butter-soft lambswool and cashmere scarfs I have, but they are all ten times as stylish as those and well worth a break-in period for the style they offer. I hand washed these in Woolite last year and noticed they became much softer after as well. Of course being true Harris Tweed, they are also quite durable as well.
The close-ups:
Provided for my own enjoyment and for that of my tweed obsessed brethren: Beige Herringbone with orange and bleu overcheck:
Grey with red and blue overcheck:
Green Herringbone with rust, red and blue over check:
Ah, the Isle of Skye, is there anywhere on this beautiful blue planet of ours that conjures up a more idyllic environ for our favorite cloth to be made into accessories that we treasure? Harris Tweed is woven in the Islands of the Outer Hebrides, just a short hope to the West from the Isle of Skye. The Isle of Skye - is all rugged coastlines, rocky spires, ancient stone circles and impossibly green hills and dales. And 'windswept', what description of this Isle could possibly be complete without the use of the word 'windswept'? I imagine our friends at Ten 10 Creations sitting back, having ended a long day making our beautiful accessories, tippling a dram of Talisker whiskey (which originates on the other side of the Isle - a mere half hour's drive away) by a glowing fireside. With the quiet confidence of knowing that they have spent their day helping to spread the passion for the good cloth and to them I raise my glass in gratitude!
Here adding a touch of class to a simple blue shirt and Navy V-neck sweater, they all look great in their own distinct color way: